3.4. How to Register a Syscob Application
Before a Syscob application can be used it must be registered at two levels. The software must be registered at the computer [“local machine”] level and a user “seat” to access the application must be registered at the “current user” level. Only after both registrations can Windows® shortcuts be created to allow the user to run the Syscob application on that computer.
The “Icon & Rego” wizard is a Windows® “installer” which does both registrations and shortcut creation. It can always be downloaded from the Tools Repository of the Syscob web site. It is like other Syscob installers (i.e. it must be run under the application user logon and “Run as administrator” under Windows Vista, or later, versions), but the “Icon & Rego” wizard does not install any software! It only enables access to what exists.
Using the “Icon & Rego” Wizard
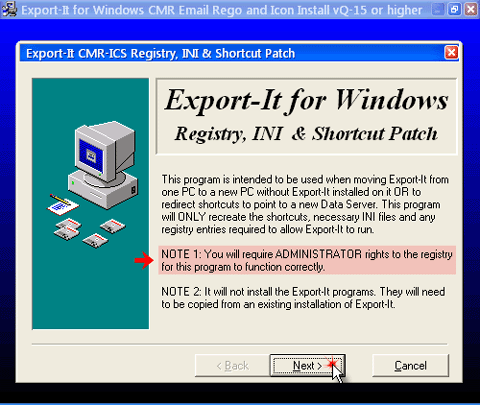
When the “Icon & Rego” wizard for a Syscob application (“” for Export-It or “” for Export-It Plus) is run it will open a full-screen gradient window with a typical installer inner window as seen in the first capture below. This example is for the Export-It application. On the first page just press the “” button.
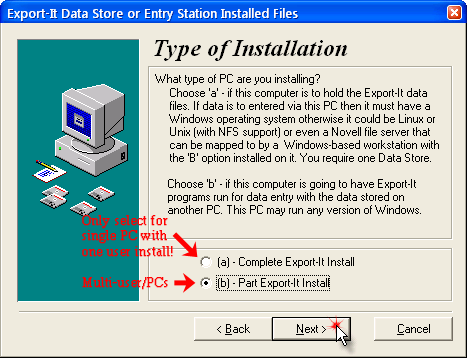
On the Type of Installation page select the type “(b) Part … Install” (unless the Syscob software is only installed on one PC for the use of only one user and the database is on that same single PC—which is the only case where a “(a) Complete … Install” is done) then press the “” button.
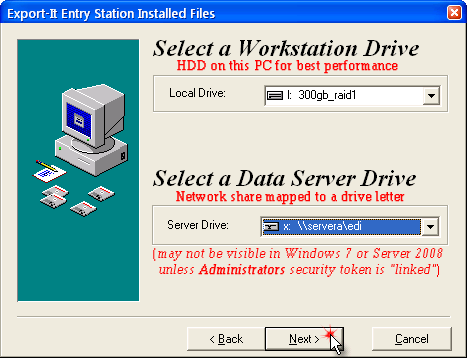
On the next page set the Workstation Drive
to the drive letter of the platform “local” drive (whose root
directory contains an “”
or “” folder with the
programs, libraries an resources needed ti run the application) and set the
Data Server Drive to the drive letter of
the mapped database “server” drive. In the case of a
single-user-on-single-PC topology (type “(a)
Complete … Install” above) set the
Destination Drive to the single local drive
letter that fulfills both roles. Then press the
“” button.
NOTE: For Windows Vista, Server 2008, Windows 7 or later a
“mapped” drive may not be visible unless Microsoft
KB937624 “fix” is applied (see Microsoft KB937624 “Fix”
appendix for details).
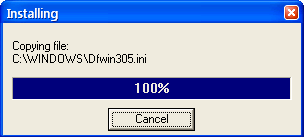
While the wizard is registering the software and creating shortcuts a small progress window, like the next capture, will be briefly visible to show the overall progress of the registration.
After the software has been registered and the user shortcuts created the wizard will automatically go to the last page. On the Registry, INI & Shortcut Install Completed! page press the “” button.
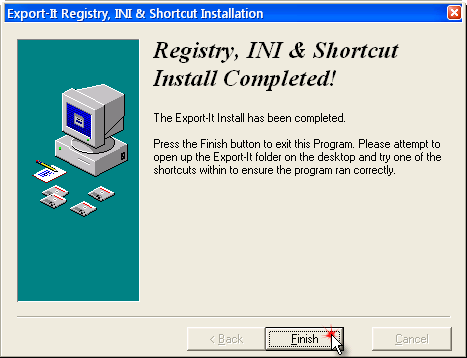
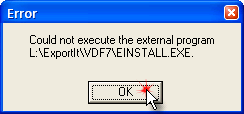
NOTE — Depending on the version of Export-It that is installed the following two [2] error dialogs may appear at the end (rather than the completed page above). Should the following dialogs appear, starting with failure to find the eInstall executable, be aware that this does not affect application registration! The eInstall program is run after the “Icon & Rego” wizard has finished. So just answer these dialogs with the “” button and ignore them.

Although the captures above illustrate registration of the Syscob Export-It application the process is identical for Export-It Plus registration.
Be aware that the registration procedure above depends on the ability of the user logon to “see” both “local” and “server” application folders (or a single folder acting in both roles) which already contain the application software and database files. See the Adding or Replacing a PC topic for how to ensure that this condition is achieved on a new machine.
Should this seat will ever act in the SEDI role, providing Secure EDI communications for all Syscob users, then the Moving or Replacing SEDI registration described in the next topic must also be done.
Finally, be aware that when more than one user logon runs a Syscob application on a computer (such as in terminal server or other “remote logon” environments) a single “local” folder can be shared by all users of the machine. But each user logon will have a unique “seat” subfolder under the shared “server” folder.
