Principles of EDI for Export
Export sales involve three [3] elements: a selling partner in Australia, a buyer partner overseas and a transport mechanism that moves the goods between the partners of the sale. Electronic Data Interchange [EDI] is similar for documents. There is an EDI user partner that is a document source, and an EDI agency partner who processes and approves (or rejects) a document and a transport mechanism that moves documents between the EDI partners.
The Australian government regulates export of “prescribed goods” and employs EDI for statutory export documentation. It designates the EDI agency partners responsible for various export documents and those agencies have computerized systems usable by exporters who register with the agency. Current EDI agencies and their systems are:
| AGENCY | SYSTEM | DOCUMENTS |
| DAFF | EXDOC | RFP & Certificate |
| Customs | ICS | EDN & Manifest |
| 1-Stop | 1-Stop | PRA (for ports) |
In addition to these EDI systems for statutory export documents (which operate in a “request/approve” mode) there is a one-way gateway provided by Bryn Systems as the BabelBrige system that can pass EDI documents from an exporter to the freight handler for transport of a shipment. Configuring Export-It software consists of setting values that identify the EDI partners and the Secure EDI [SEDI] transport mechanism.
Software “Owner” is an EDI Partner
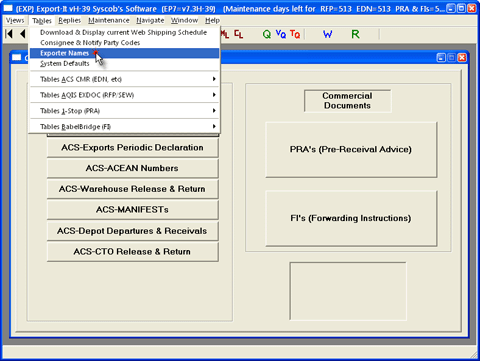
Configuration must begin with specifying the organization, an exporter or other business involved in exporting, that “owns” this Syscob software installation. Run ExportIt (icon at right) and choose Exporter Names from its Tables menu as seen in this capture of the window of that module:
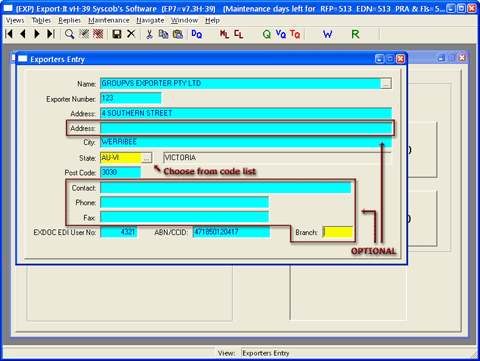
In the Exporters Entry window that opens enter the organization name, address and ABN (or CCID) number. If the organization is registered with DAFF as an exporter then also enter the Exporter Number that was assigned by DAFF to the registration. If registered to use the EXDOC system the EXDOC EDI User No. assigned by that registration must also be entered. The completed information will look like this example:
After needed settings have been entered press the [F2] key (function key 2) to save the “owner” information. A confirmation dialog will appear before the settings are saved:
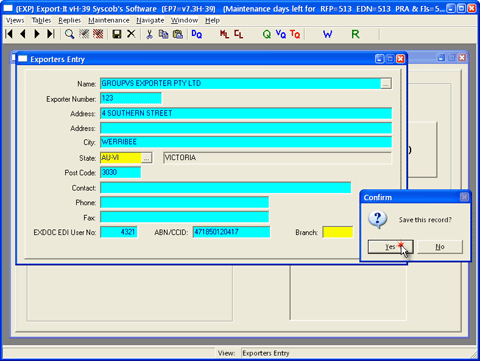
Press the OK button to allow the save (the form content will disappear) and then close the Exporters Entry window.
Specify the EDI Partners to the Software
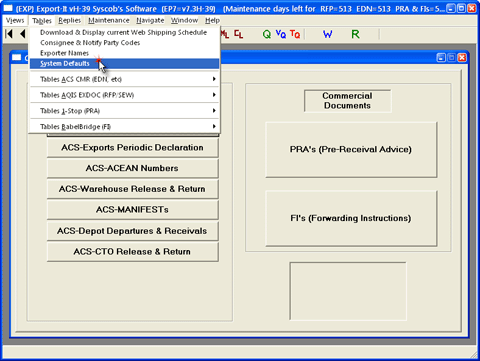
Once the “owner” organization exists in the exporters table the next step is to choose System Defaults from the Tables menu so that the EDI partners for this installation may be specified:
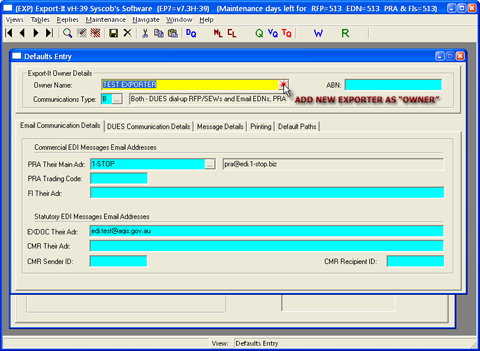
In the Defaults Entry window that opens the first action is to select the newly created organizarion as the “owner” EDI partner. Press the button with an ellipsis […] at the right of the Owner Name field:
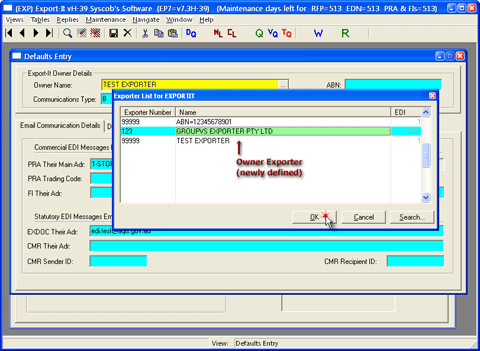
A list window will open where the owner can be selected so that it is highlighted. Then press the OK button to chose this organization:
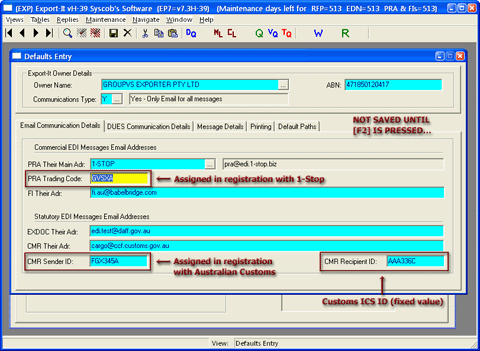
In the Export-It Owner Details group also set the ABN and change the Communications Type to be “Y” (“Yes – Only Email for all messages”) which is the only transport the government currently allows for EDI.
On the Email Communication Details tab the EDI partners used by this organization must be specified. If registered to use the 1-Stop system for PRAs then enter the PRA Trading Code that was assigned by that registration with the 1-Stop agency. If registered to use the EXDOC system for RFPs and certificates then the EXDOC Their Adr email address (initially the test system) must be set. Finally, if registered to use the ICS system for EDNs then enter its CMR Their Adr email address, the CMR Sender ID assigned by that registration and the fixed CMR Recipient ID that identifies the ICS system:
When all of the EDI partner settings have been made press the [F2] key (function key 2) to save the EDI partners information. A confirmation dialog will appear before the settings are saved:
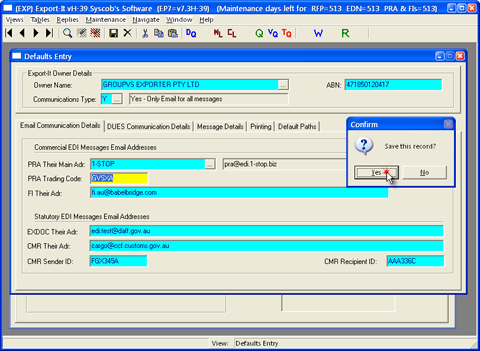
Press the OK button to confirm saving these settings.
Choosing Printers for Text and PCL Documents
Go onto the Printing tab and choose the printers that this user will employ. There are settings for how remote certificate printing (which uses HP Printer Command Language [PCL] files) is handled and another choice for print of text documents like an RFP, PRA or EDN. Because PCL files for printing are sent once, and only once, it is critical that the Save Print File setting is “S” [save] to avoid loss of a certificate should the chosen printer be not ready. And, since recent Windows® versions no longer support physical printer port routing, the Printer Port setting should be empty as in this example:
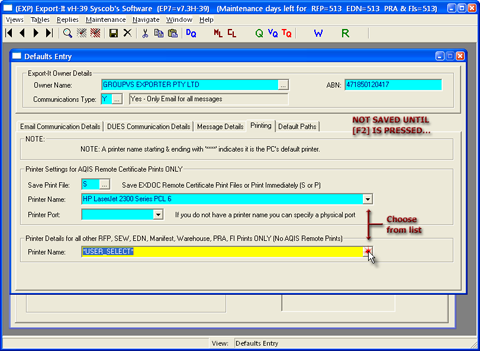
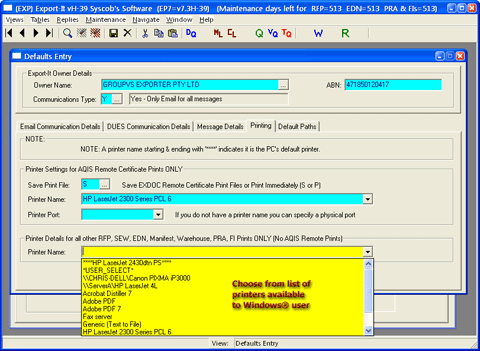
Choice of the printer to use for either PCL or text printing is performed in the same way. Press the button with an ellipsis […] at the right of either Printer Name field to drop down a list of printers for selection. In addition to all physical printer devices there is a “*USER_SELECT*” option which will defer choice of the printer to be used for a document until the document is being printed. The list will look something like the list seen in this sample:
When all of the printer settings have been made press the [F2] key (function key 2) to save these settings. A confirmation dialog will appear before the settings are saved:
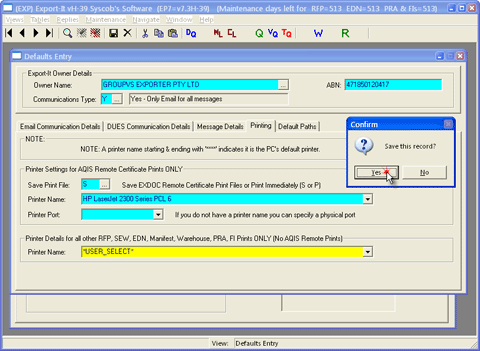
Press the OK button to allow the save, then close the Defaults Entry window and then close the main ExportIt window.
Specify Secure EDI [SEDI] Transport Settings
When it is started the SEDIexp cycle manager (icon at right) displays an Information dialog which indicates its operating mode. Press the OK button to close this dialog:
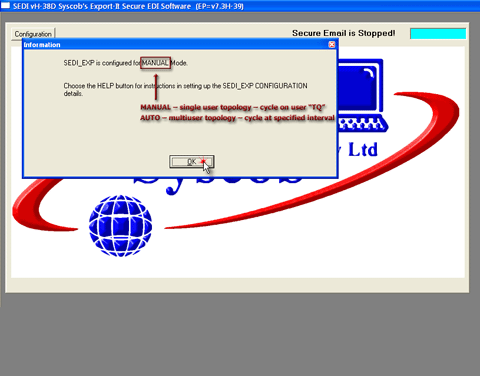
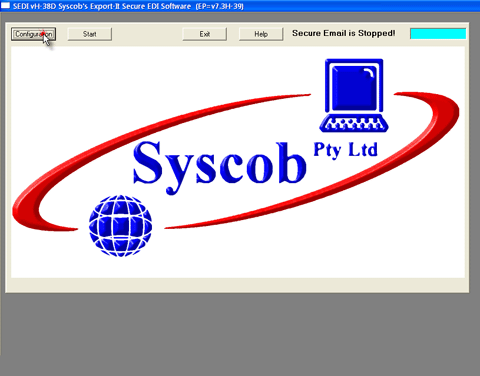
Press the Configuration button to specify the settings to be used for Secure EDI transport between EDI partners:
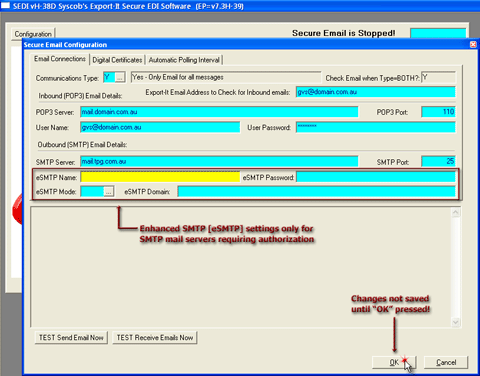
On the Email Connections tab of the Secure Email Configuration window that opens ensure that the Communications Type is “Y” (the government no longer allows other types) and then enter the email address that is dedicated to EDI communications by Syscob software (i.e. it cannot also be used for any other purpose).
Then set the DNS name, or IP address, and port for both the POP3 and SMTP mail servers used for retrieval and transmission of EDI traffic. Neither mail server, which may be different or the same, may require use of Secure Sockets Layer [SSL] connections. Because POP3 protocol requires a logon enter the User Name and Password for that logon, but do not enter such information for the SMTP mail server unless it requires Enhanced SMTP [eSMTP] authorization. After entry of SEDI settings press OK to save them:
Saving settings will close the Secure Email Configuration window so press the Configuration button in the main SEDI_exp window again to reopen it. If Digital Certificates are needed by direct communications with the ICS system for EDNs then see section 2 of the Syscob Admin Guide, which starts with the SAG: Secure EDI [SEDI] Communications page, for details on the certificates needed, their costs and how to acquire and manage them.
However, since EDNs can be obtained by most via the Single Entry Window [SEW] facilities of the EXDOC system, most Syscob installations may ignore the Digital Certificates tab and go directly to the Automatic Polling Interval tab where the SEDI cycle mode and the interval between automatic cycles are set:
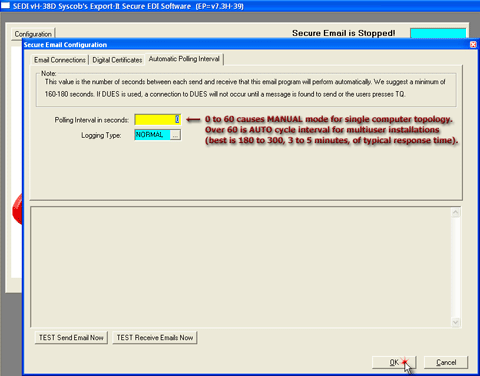
When Export-It is only installed on one computer for one user leave the Polling Interval in seconds value at zero so that a SEDI cycle will occur when that user presses the TQ button in any module. For multiuser topologies set the Polling Interval in seconds value to the interval at which SEDI cycles are to occur (with 180 to 300, 3 to 5 minutes, being the best match to EDI partner response times). A SEDI cycle will occur at the specified interval to transfer EDI traffic for all users. After setting the interval press OK button to save it.
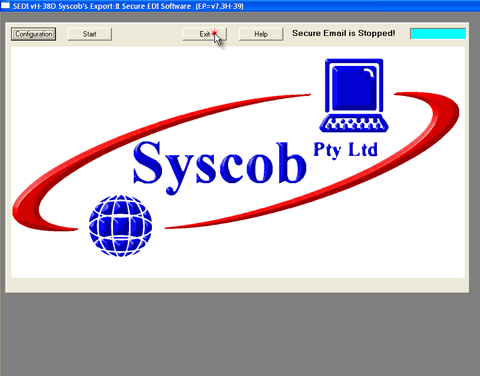
Back in the main SEDIexp window, after all SEDI settings have been specified, press the Exit button to close that window.
Generate Maintenance Invoice to Enable Software
Run the ExportIt module (icon at right) again. This time there will be an Information dialog stating that there is a security problem—because the software “owner” and the SEDI settings have changed and no longer match the maintenance code. Press the OK button to dismiss this dialog:
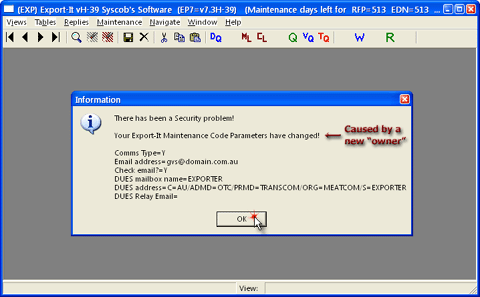
All of the large buttons in the main window will be disabled, as will be SEDI transport, because of the absence of a valid maintenance code. Obtaining a new maintenance code requires choosing Generate Maintenance Invoice from the Maintenance menu as in this capture:
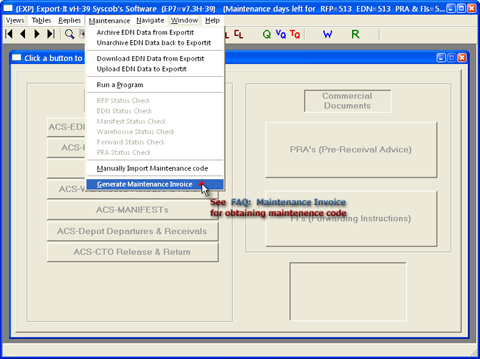
Refer to the FAQ: Maintenance Invoice topic for instructions on generating a maintenance invoice and obtaining a maintenance code to enable the Syscob software for use. That page has illustrated step-by-step instructions for this process.